Strawberry Rhubarb Pie

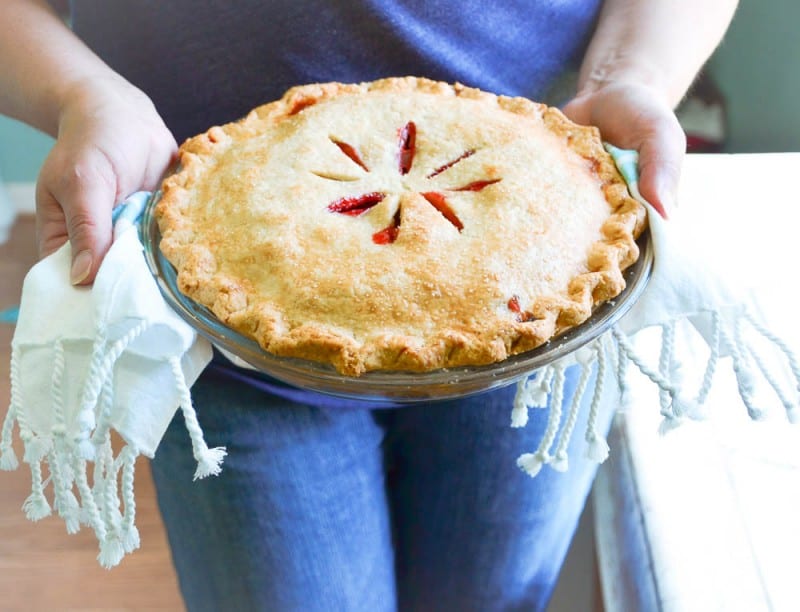
I couldn’t let strawberry season slip by without making a strawberry rhubarb pie, and honestly, I had intended to share this recipe sooner but it got kind of crazy around here. But, if you still have some late season strawberries you want to use here is your pie.
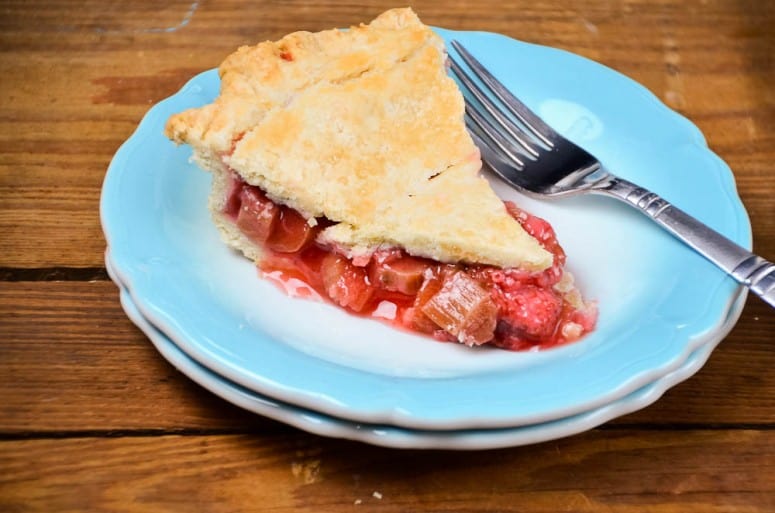
Strawberry Rhubarb pie has always been one of those challenging pies for me, it took me a long time to find a thickening agent that was able to handle all the juices strawberries release as they cook. Tapioca starch or flour does a pretty decent job of preventing your pie from turning into a puddle as it bakes, and is one of my favorite thickeners to use in berry pies because it doesn’t create a cloudy filling like flour and cornstarch can.
This pie really didn’t last long at my house, and I had to fight back family members while I attempted to get pictures, but I think it was a nice way to en the strawberry season.
Ingredients
Method
- Preheat oven to 400°F.
- Roll out your pastry dough and line the bottom of a pie dish with it. Trim to 1/2 inch from the edge. Put dish in refrigerator to chill.
- In a large bowl, gently combine the rhubarb and the strawberries with the sugar, tapioca, salt, and orange zest. Let sit for 10 minutes.
- Place the filling into chilled pastry lined pie dish. Roll out the second pastry dough and place over the pie. Trim the edges to an inch from the edge of the pie dish. Tuck the top crust edges over the bottom crust edges and use your fingers or a fork to crimp to seal edges together. (I like to add a glaze and sprinkling of course sugar on my pies, by using a pastry brush to brush a thin layer of egg white over the top of the pie and sprinkle with sugar.) Cut slits in the top for the steam to escape.
- Place pie on the middle rack of a 400°F oven, with a baking sheet on a lower rack to catch any juices that might spill over. Bake for 20 minutes at 400°F, then reduce heat to 350°F, and bake an additional 40-50 minutes longer (50 to 60 minutes longer if doing a 10-inch pie). The pie is done when the crust is nicely browned and the filling (that you can see through the venting holes) thick and bubbly. Remove from oven and let cool on a rack.
- Serve warm or cold. If you do cool to room temperature, the juices will have more time to thicken.
Tried this recipe?
Let us know how it was!


What a yummy looking strawberry-rhubarb pie you’ve made! Beautiful!
Thank you, Sue!